
What is a Pneumatic Vacuum Elevator?
Lots of people are unfamiliar with elevators, particularly pneumatic elevators. So what makes it different from a traditional residential elevator?
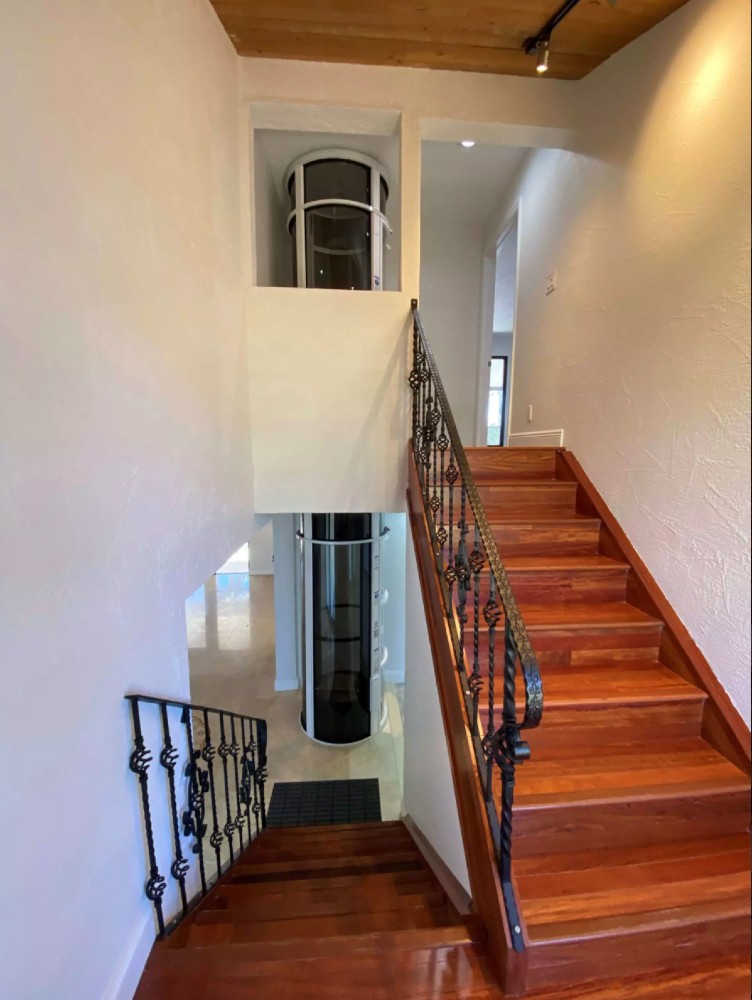
A Pneumatic Vacuum Elevator (PVE) is a modern residential elevator that operates using air pressure instead of cables, pulleys, or hydraulic systems.
These self-supporting lifts consist of a cylindrical shaft and a vacuum pump system that controls the ascent and descent of the elevator cab.
Differing from traditional home elevators, pneumatic vacuum elevators (PVEs) are known for their space efficiency, minimal installation requirements, and sleek, contemporary design.
Also, traditional elevators typically require pits, machine rooms, or extensive structural modifications, PVEs can be installed with minimal disruption.
The vacuum technology creates a pressure differential, lifting and lowering the cab smoothly within the tube.
This makes PVEs an excellent option for retrofit projects, small homes, and aging-in-place solutions.
We’re diving deep into the background of pneumatic technology and how to get started.
Benefits of a Home Elevator Installation
Adding a home elevator offers numerous benefits, especially for homeowners looking to improve mobility and future-proof their living space. Key advantages include:
- Accessibility & Mobility – Ideal for elderly homeowners, individuals with mobility challenges, or multi-story homes.
- Minimal Footprint – PVEs require significantly less space compared to traditional elevators.
- Quick Installation – Compared to hydraulic or cable elevators, PVEs can be installed in a fraction of the time.
- Energy Efficiency – Uses air pressure rather than electricity for movement, reducing energy consumption.
- Modern Aesthetics – Sleek, transparent, and contemporary designs blend seamlessly into any home interior.
- No Machine Room Required – Eliminates the need for large pits or dedicated rooms, making it easier to install in existing structures.
While PVEs offer an attractive and practical solution for homeowners, the installation process still requires careful planning, compliance with safety regulations, and a professional approach to ensure optimal functionality and longevity.

Pre-Installation Considerations
Space Requirements & Placement Options
Before installing a pneumatic vacuum elevator, it’s essential to determine the best location in your home. These elevators have smaller footprints than traditional home elevators, but they still require a clear, open area for proper installation.
Keyspace requirements:
- Standard Diameter: Most PVEs have a diameter of 30 to 52 inches (depending on model and capacity).
- Ceiling Height Clearance: The top of the elevator requires extra clearance for the vacuum machinery—typically at least 8 to 10 feet.
- Landing Areas: Sufficient space must be allocated at each stop level for safe entry and exit.
Best Placement Options:
- Near staircases for easy access between floors.
- Inside open-plan living areas for seamless integration.
- Along load-bearing walls to ensure stability.
- As a freestanding unit in larger rooms.
Electrical & Power Supply Needs
While PVEs do not require machine rooms or extensive wiring, they do have specific electrical power requirements. Before installation, an electrician must evaluate whether the home’s current electrical system can support the elevator’s needs.
Typical power requirements include:
- 220V power supply (some models operate on 110V but with limited efficiency).
- Dedicated circuit breaker for elevator operation.
- Backup battery system (optional) for power failure safety.
Since these elevators use vacuum pressure rather than motors for movement, the energy consumption is significantly lower compared to hydraulic or cable-driven elevators.
Structural Modifications & Permits
Although PVEs require minimal structural changes, homeowners must still comply with local building codes and obtain permits before installation.
Potential structural considerations:
- If installing through a ceiling/floor opening, ensure the floor is strong enough to support the cylinder base.
- Homes with wooden joists may need additional reinforcements.
- If placed in an open space, ensure the flooring is level and the surrounding area is stable.
Permits and regulations vary by state and municipality, so it’s crucial to check local laws regarding:
- Residential elevator safety codes.
- Fire safety and emergency exit requirements.
- ADA compliance (if applicable).
Working with a licensed elevator contractor ensures all structural and legal requirements are met before proceeding.
Step-by-Step Installation Process
1. Preparing the Installation Area
Before assembling the elevator, the designated space must be cleared and prepped. This step involves:
- Removing furniture or obstructions from the installation area.
- Ensuring proper floor leveling for stable elevator base placement.
- Marking access points for multi-story installations.
- Installing necessary electrical wiring and ensuring power availability.
At this stage, professionals may also check for any potential ceiling reinforcements or floor modifications needed.
2. Assembling the Pneumatic Elevator Cylinder
Once the area is prepared, the next step is to assemble the vacuum elevator cylinder. The process typically includes:
- Positioning the base on the designated floor space.
- Stacking and securing the cylindrical sections.
- Aligning the airtight seals between each section.
- Installing the elevator cab inside the cylinder.
Each component must be precisely aligned to ensure proper vacuum function. This process may take several hours and requires multiple technicians.
3. Connecting the Power & Air Pressure System
After the cylinder is assembled, the vacuum pump system is installed and connected. This step involves:
- Mounting the vacuum turbine (usually placed on top of the cylinder or externally).
- Connecting the air pressure regulation system.
- Installing control panels for elevator operation.
- Ensuring proper air sealing for smooth lift function.
Since PVEs operate via air pressure differences, ensuring a leak-proof assembly is critical for efficient performance.
4. Securing the Elevator & Safety Checks
Before the elevator is operational, installers perform several safety checks, including:
- Verifying airtight seals around the cylinder.
- Testing pressure levels to ensure smooth lift operation.
- Checking emergency braking systems and manual descent options.
- Inspecting power connections for electrical safety compliance.
Once all safety tests are completed, the elevator is ready for use.
Post-Installation Requirements
Safety Testing & Certification
To comply with residential safety regulations, the installed elevator must undergo certification and final inspection.
A licensed inspector will:
- Ensure the installation meets local building codes.
- Test emergency stop features.
- Verify load capacity limits.
- Issue a safety certification for homeowner use.
Maintenance & Troubleshooting Tips
Pneumatic elevators require minimal maintenance compared to traditional systems, but routine checks ensure optimal performance. Key maintenance tasks include:
- Cleaning the air seals to prevent leaks.
- Inspecting vacuum pump filters periodically.
- Lubricating moving parts as needed.
- Testing emergency descent functions.
Most manufacturers recommend a yearly professional inspection to maintain warranty compliance.
Conclusion & Next Steps
Installing a Pneumatic Vacuum Elevator is a highly efficient way to improve home accessibility while adding modern style. However, proper planning, professional installation, and adherence to safety regulations are crucial for a successful setup.
If you’re considering a home elevator installation, it’s best to consult an experienced installer to assess feasibility and ensure a safe, hassle-free process.
For more details on elevator models, pricing, and professional installation services, check out our service pages and related resources.
FAQs
A typical pneumatic vacuum elevator (PVE) installation takes 2-3 days, but the exact timeline depends on several factors:
- Pre-Installation Modifications – If your home requires electrical upgrades, minor floor reinforcements, or other adjustments before the elevator can be installed, this could add additional preparation time.
- Number of Floors – A one-story installation is usually faster, whereas a multi-story elevator may require extra time for securing the shaft and aligning stops.
- Permit Approvals & Inspections – Depending on your local building regulations, there may be a wait time for permit approvals and safety inspections before and after installation.
- Installer Availability – Working with a certified installer ensures efficiency, but scheduling availability may impact the overall time frame.
Once the installation is complete, the final steps include calibration, safety testing, and certification, which may take another half-day to a full day before the elevator is fully operational.
No, professional installation is strongly recommended for safety, compliance, and functionality.
While PVEs are designed to be less complex than traditional elevators, they still require specialized knowledge to ensure proper setup. Here’s why DIY installation is not advised:
- Structural Considerations – Even though pneumatic elevators don’t require pits or machine rooms, the home still needs proper floor leveling, clearance, and load-bearing capacity to accommodate the lift safely.
- Electrical Wiring & Power Supply – PVEs need to be connected to dedicated power circuits that meet specific voltage requirements. Incorrect wiring can lead to malfunctions or safety hazards.
- Air Pressure System Precision – The elevator operates using a vacuum-based air pressure system, which requires precise sealing and calibration. Improper installation can lead to air leaks, inefficient performance, or system failure.
- Regulatory Compliance – Most local building codes require a certified installer to ensure the elevator meets safety and accessibility standards. Unauthorized installation may result in fines or legal issues.
Attempting a DIY installation could void the manufacturer’s warranty and put the user at risk of operational failures or accidents. For a safe and long-lasting installation, always rely on a licensed professional.
Yes, a final safety inspection by a licensed inspector or local building authority is required before the elevator can be used.
The inspection ensures that:
- The elevator meets all safety codes and building regulations – This includes proper installation, weight capacity compliance, and emergency safety features.
- All electrical and vacuum components function correctly – The inspector will test the power supply, vacuum pump system, air pressure seals, and emergency braking systems.
- Emergency features are operational – This includes backup power options, manual descent features, and emergency alarms to ensure the elevator remains safe in all scenarios.
- Users receive proper operational guidance – Inspectors or certified technicians often provide a user demonstration, teaching homeowners how to use the lift safely.
Failure to obtain a professional inspection may lead to:
- Non-compliance with building codes – Making it illegal to operate the elevator.
- Potential warranty voiding – If the manufacturer requires post-installation inspections as part of the product guarantee.
- Safety risks – An unchecked system could lead to air leaks, electrical issues, or emergency failures over time.
Even after initial approval, routine professional maintenance checks are advised to keep the elevator in optimal condition and ensure long-term reliability.